Simulation Overload (Season 1): The Apocalypse Amongst Giants
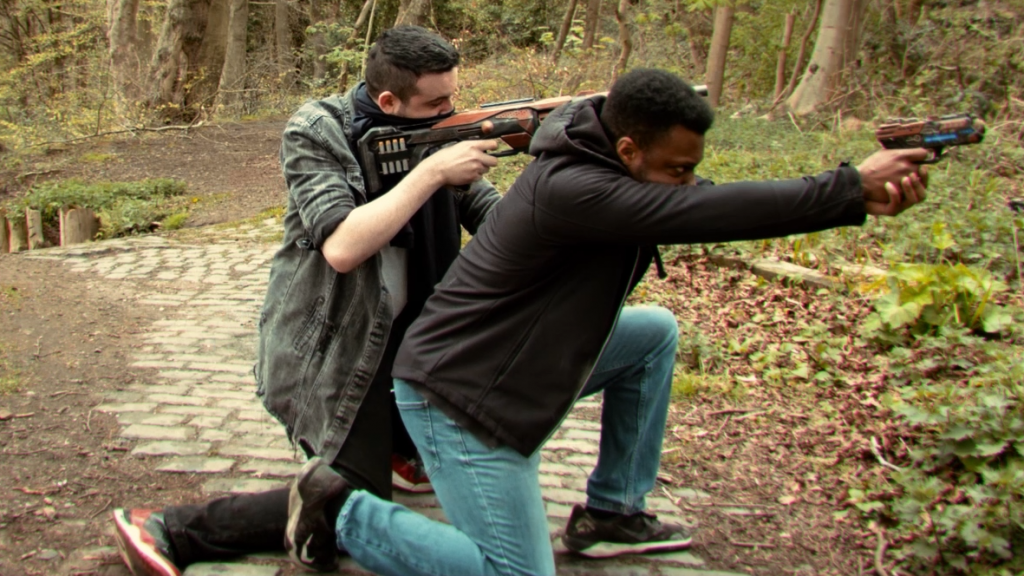
I designed and created 3 guns as part of the Season 1 Trailer for Simulation Overload: The Apocalypse Amongst Giants by Mojo Studios.
Before starting to actually make them, I began by creating a few different design mockups. Once a basic colour design was decided on between me and the person in charge of the project, I began to disassemble and fully assess the guns we had chosen to use for the project. Once I had assessed just how much of our design I was able to actually implement into the physical prop.
Below you can see the development of 2 of the guns. I have only included a few of the iterations of the mock-ups as the other designs only had minor changes.
In the areas I marked on the guns with blue, I had to drill and file the indents to create holes that allowed me to have the light visible.
I marked where I could actually install LEDs into each gun as some of the internal shells interfered with some placement of the LEDs. I then went through the main stages of the design such as disassembling the guns, and applying at least 1 coat of primer, then to add surface imperfections and detail, I used a combination of a wire brush, sandpaper, steel wool some small files, and a small hacksaw to add various depths of scratches and gauges into the surface of the guns to make them look more used.
I then re-coated the guns with primer to ensure that the metallic gunmetal base coat would adhere properly. Once that had dried, I applied a coat of matte black spray paint as this would be the main base coat. Once dried I repeated the same steps to create the scratches as the black paint would be scratched away revealing the metallic undercoat. This worked for the most part, however certain parts I was too aggressive with re-adding the scratches so I had to go back in with a dark silver paint and drybrush some more fake scratches on top of the black.
In order to age the paint effect, I used black and brown shoe polish as a wash to add a dirt effect to the paint and highlight all of the detail. The copper panels were hand-painted using a reactive metal paint that I applied a primer paint and then the metallic paint. I followed the directions to use the paint and used the reactive spray to add a patina to the copper accents. Once the patina effect had reacted fully and dried, the effect was too strong and also seemed to create a white residue over the whole thing, this disappeared when I used a wipe to try to remove some so in order to seal in that “wet” look I applied a brown shoe polish wash as that worked nicely with the copper colour and added a warmer colour back to it.
After all of the painting and weathering was done, I began to add the blue COB LED strips. I measured out the approximate length I needed by using the cut points/contacts. I used a transparent light blue plastic from a plastic wallet. This allowed the cutouts on the guns to remain a shade of blue even when the LEDs are off.
I wired each led strip one at a time, using heat shrink tubing over the soldered connections and then attaching the plastic and then the LED strip with hot glue.
I used a small amount of hot glue to tack in the 3.7v Li-Po batteries into the handle and since the guns were originally Orbeez guns, i re-purposed the ammo slide at the top to mount the recharge board so that the batteries can be charged more easily with simply a micro USB cable. I did also connect the Large blue Cree LED (used for the barrel on the pistol) and the battery with a JST connector as if they failed, they can be replaced far more easily than having to desolder the connections.
To mount the switch on each gun, I marked out a spot that allowed the LEDs to be easily activated with the same hand that holds the gun so it allows for a more fluid motion in order to activate the lights.
Part of the final design that was decided upon for the larger Orbeez gun was going to be a flat circular cut out for lights however this was actually decided against and instead it was agreed that a barrel replacement was more suitable. To create this, I used 2 different lengths of 2 slightly different outer diameters of plastic conduit pipe. I primed the white conduit and then hand-painted a dark silver. To make it look like scorched metal, I originally just used black shoe polish but after looking at it I realised it was too glossy. Instead, I used some black oil pastels that I shaved and rubbed on the ned with my finger. This gave a more realistic soot look to the end of the double-barrel. To hold the new barrel I traced around the conduit pipes onto some acrylic and cut a rectangle with a figure 8-shaped hole in the middle. After carefully sanding the front of the gun to allow both barrels to fit, I glued in the acrylic and the barrels.
I also wrapped the front end of the larger pistol with some old fabric I stained with brown shoe polish, brown paint coffee powder, and hot water mixture. I glued it on and to make the edge near the barrels look more realistic, I singed the edge with a lighter.
Initially, the 3rd gun was going to be a Nerf Recon CS6. After a few different designs, it was decided against as we only had the central piece, and there wasn’t enough time to make or purchase a stock. The budget for the production also didn’t cover a stock and barrel. In the end, to expedite the process and reduce costs, a replacement gun was sourced and mock-ups were made.
In the end, we used a Ner Eaglepoint. This was primarily because of the fact that it was already a full rifle and it even had a removable barrel extension. Although I included the scope in the design, I was unable to paint the scope to match as I couldn’t disassemble it and the geometry was complex which would have meant a lot of time would be required to properly mask each section. It was agreed that the scope would be left out of the final design for the rifle.
I used the same process to paint the rifle as I did the 2 other guns, I disassembled the gun, sanded off the Nerf badges and other text, and used some filler to hide some of the indentations of where some of the text was on the main body. Once primed I skipped the silver undercoat as it actually ended up taking more time as I had to allow the paint to dry before I could apply the black. I then painted all of the copper panels with the primer and then the metallic paint. After I applied the reactive spray, I used some brown shoe polish to add some weathering and bring the warmth of the copper colour back again. In some places, I used a stippling motion which in the rear dart holder, it actually built up into what looked like clumps of dirt. I then actually had to go over all of the black paint because the reactive spray left a spotty residue. Once that dried I went in with a small file to add some deep gauges into the body of the gun. I then used the same dark silver on the other guns to carefully paint in the recesses of the deeper gauges to make it look the body of the gun is all metal. I also did some dry brushing to add a scratched look and break up some of the large black panles.
